Unity Game - Optimization Techniques

One of the Key areas when Improving performance in any game is reducing the amount of calls the CPU has to send over to the GPU, We can reduce this in many ways and below I am going to list and detail a few of them.
Static Batching:
A good place to start is checking that the assets in your hierarchy that aren’t dynamic at all are set to static and are included in the static batching. You can do this by selecting the assets in the scene and checking the box for “Static” in the top right. Next to this is a drop down arrow, if you select this you can then set your selection to be included when the static batching.
Once you have done this make sure to go into your settings and select static batching, this is found under project settings > player > Other Settings > Static Batching. Now when you play your scene you should be able to enable the frame debugger and see that the objects have been split into static batches, these are the different groups of assets that are batched together. (note. objects with different shaders will not be batched together.)
Mesh Combining:
Manually combining multiple meshes into a singular mesh is a further way to reduce our calls. This method is perfect for stacked crates or scattered debris meshes. You can combine the meshes in your modelling package and adjust the UV’s to use a texture atlas or you can create a tool in Unity to combine the meshes within the engine and merge the materials together separately. Doing this will give you more control over which assets get merged together and you can use these combined meshes as a prefab to use throughout your scene.
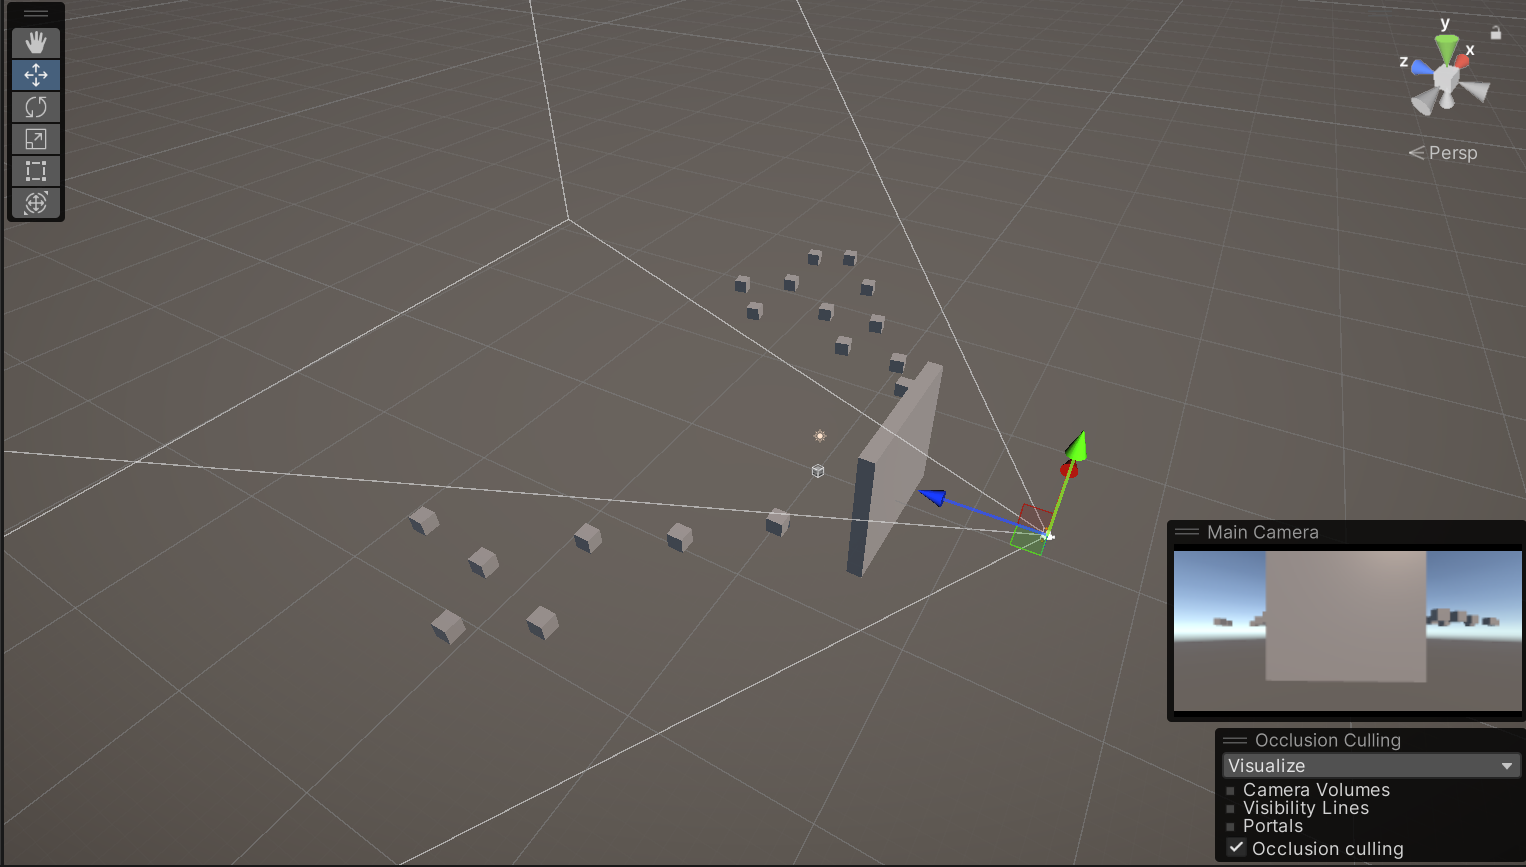
Occlusion Culling:
Occlusion culling works by not rendering any static assets that are currently unseen by the camera in the scene. This will remove any meshes not within the camera’s frustum or those which are blocked by a larger occluder mesh. It is important correctly configure the occlusion culling settings menu, This is because if your occlusion size is too large you may be able to see assets popping in and out of existence when moving around the scene.
While baking occlusion culling in your scenes can help improve performance and reduce the amount of assets rendered, it is worth profiling your changes and verifying that the setup is saving you frame time. From previous experience I have noticed a drop in performance when culling a large number of assets compared to not culling any of them, this was due to the load being moved from rendering on the GPU to culling on the CPU.
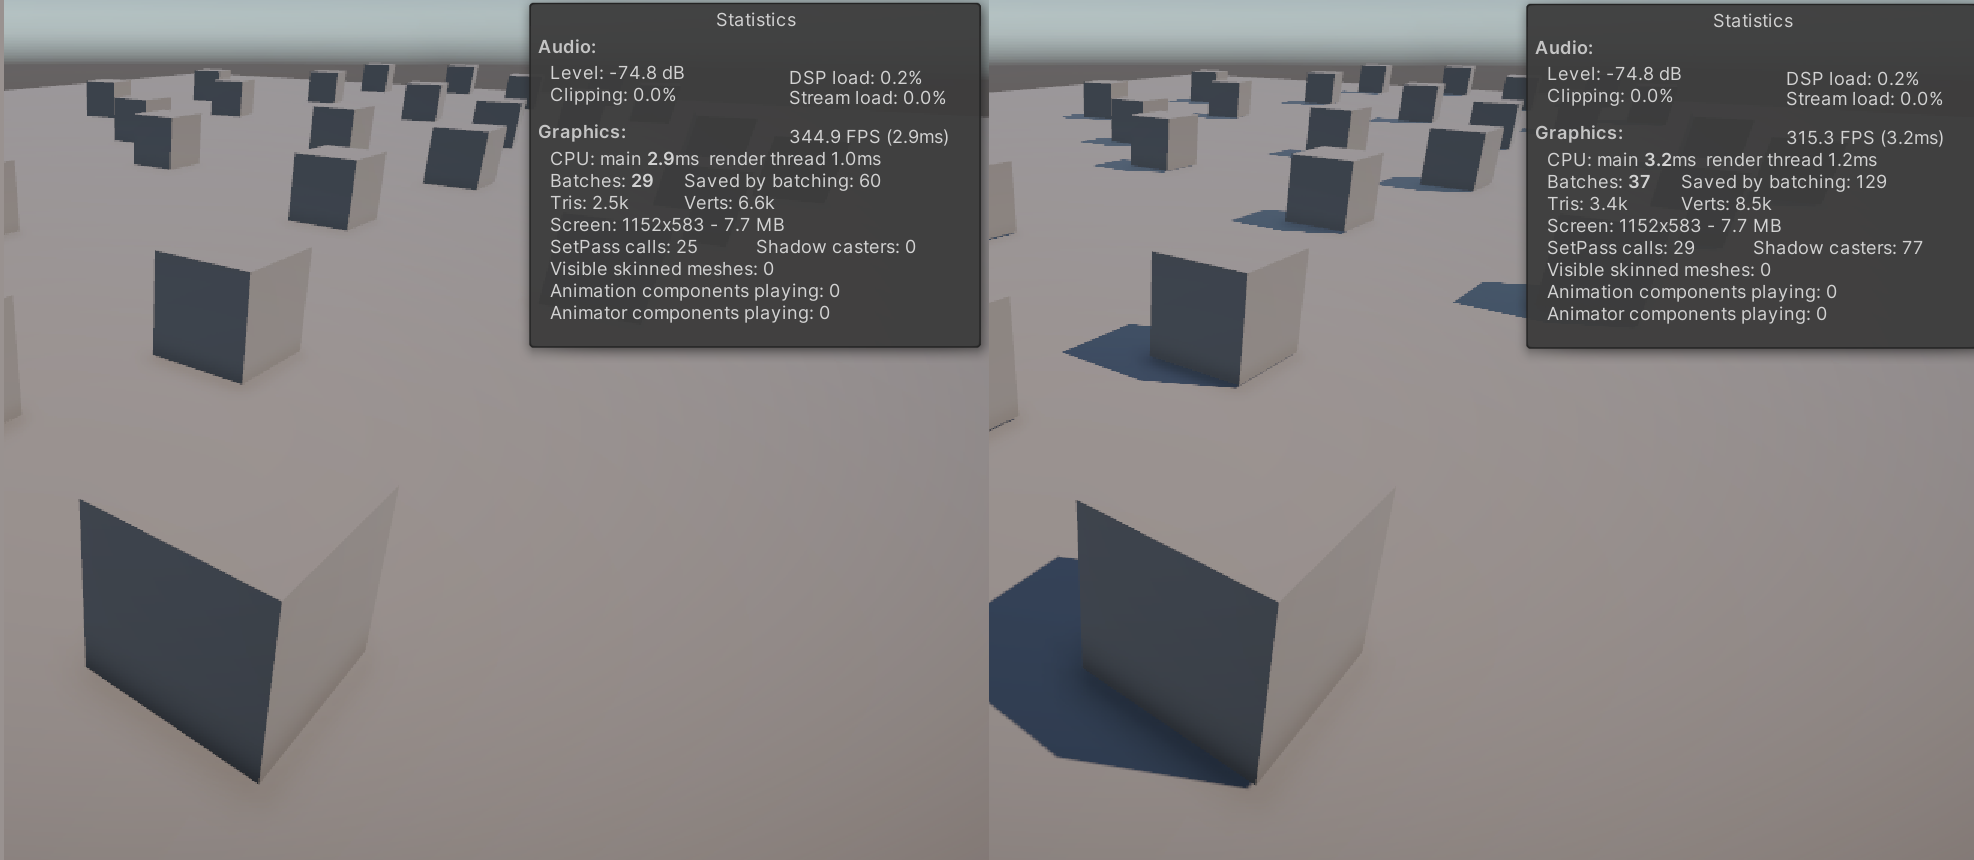
Lighting:
Objects in a scene can only be affected by a set amount of real-time lights at once. For this reason using Baked lighting is much more efficient to use, especially for VR or mobile development where you will be using Forward rendering instead of deferred rendering. Adding shadows to objects also adds time overhead to this operation and increases your draw call amount. I would recommend you turn these off where possible and use other methods to create fake shadowing if developing for a mobile platform with reduced performance.
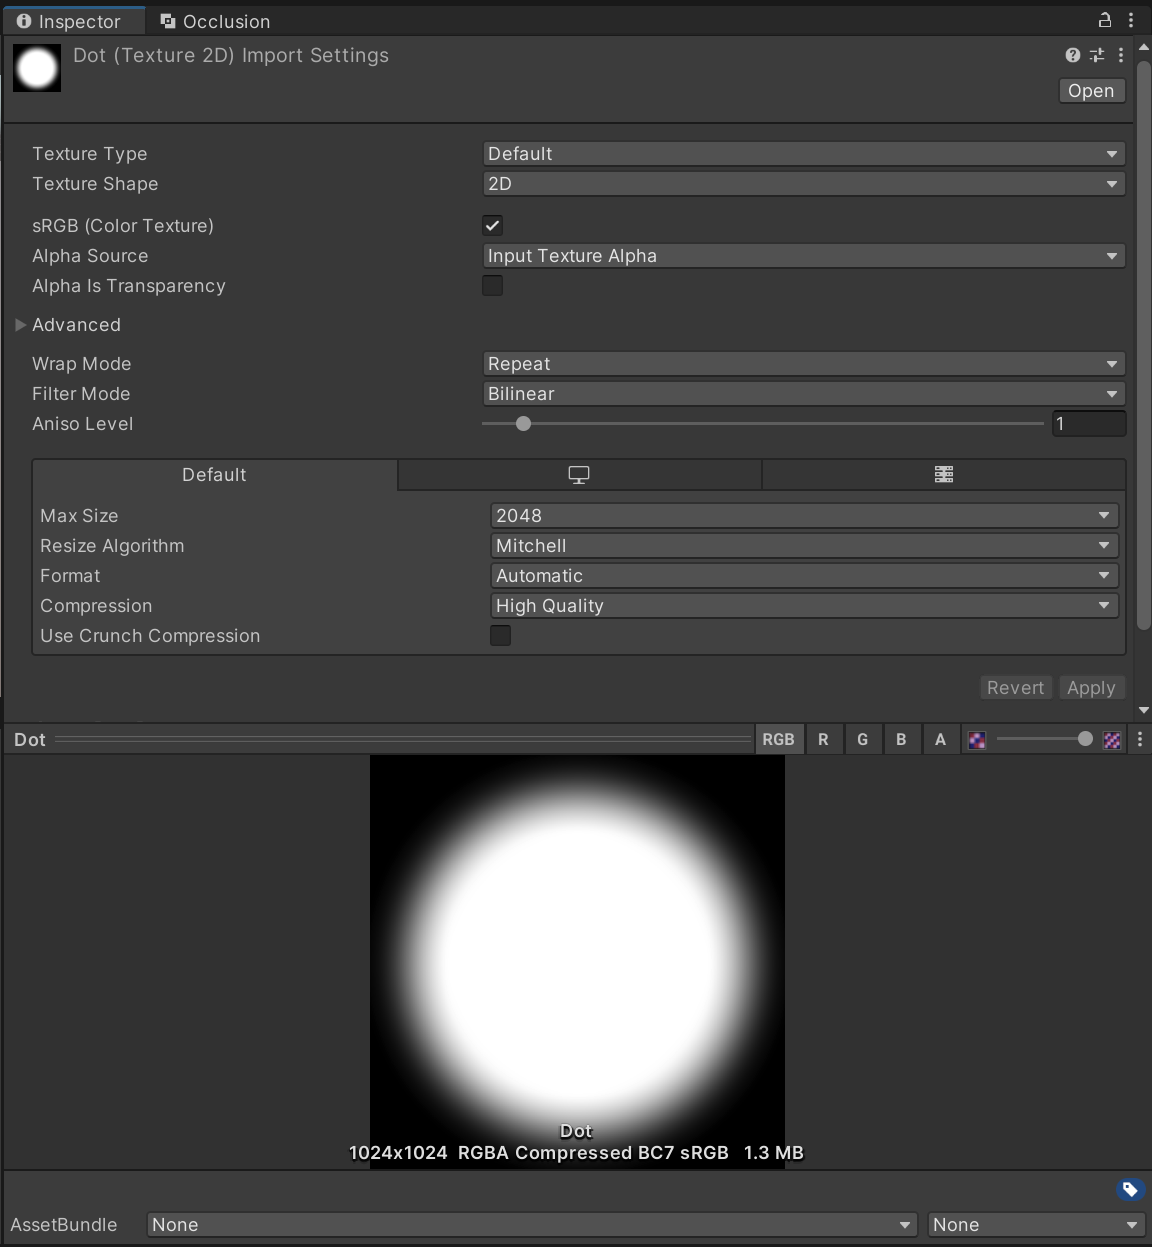
Texture Compression Settings:
It is important to research and implement the correct textures compression settings for your target platform. Doing so will utilize less memory and allow it to be used for more important tasks. Unity has a great list of the compression types available and which to use for a variety of hardware. This link will take you to the Unity Documentation on Compression: docs.unity3d.com/Manual/class-TextureImporterOverride
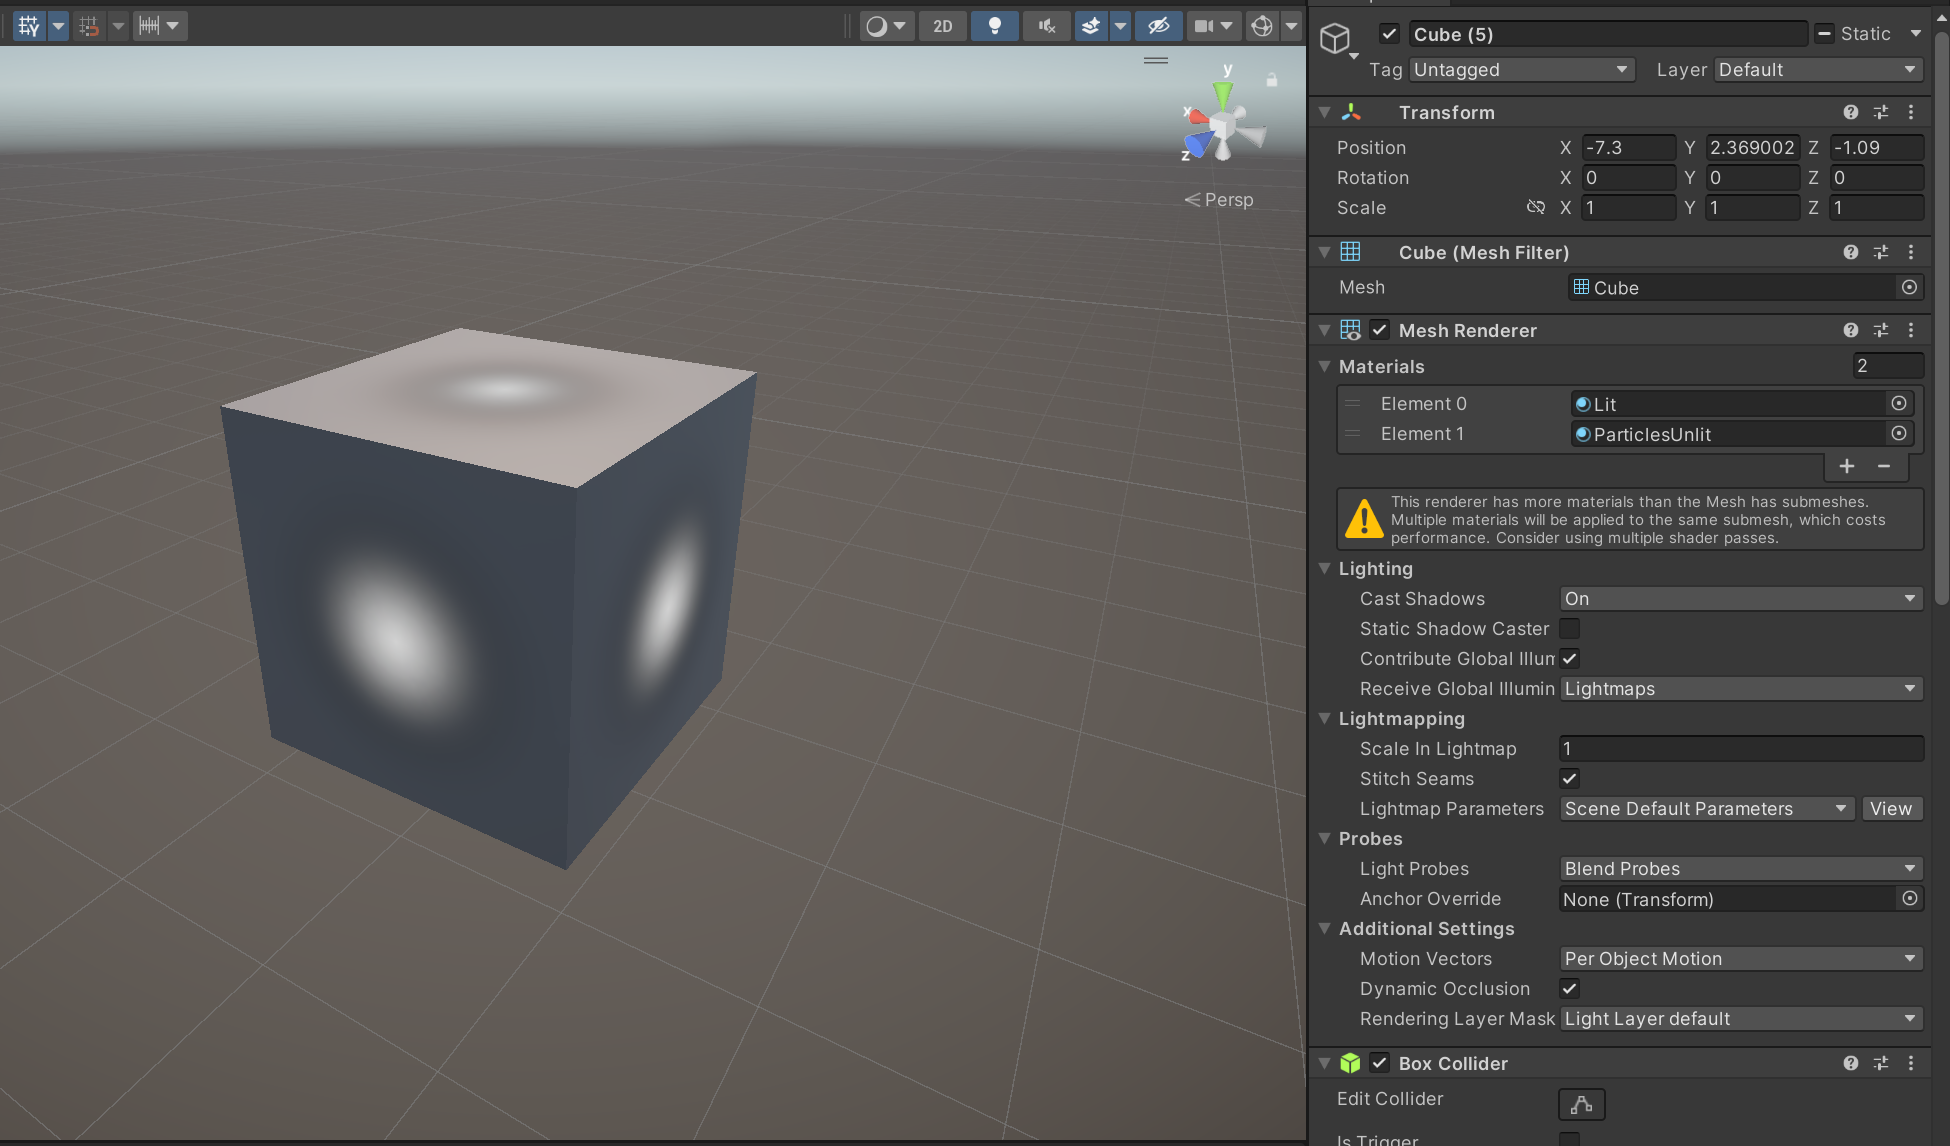
Material Optimisations:
Further to texture compression we can optimize our material usage as well. One approach is texture atlases, these require you to unwrap the mesh in a specific way to match a large array of textures all stacked in a grid. This one large texture can then be applied to a material and used across a scene on a variety of assets and save us a large amount of draw calls.
A second approach to material optimization would be creating texture array’s, for this we would take a selection of textures and stack them (a bit like a deck of playing cards). These can then be accessed through a shader using an index to select the layer you’d like to use for each material. Texture array’s are more complicated to setup compared to texture atlases, this is due to them requiring scripting knowledge to implement. A drawback of this approach would be that all the textures are required to be the same size throughout.
Reducing the amount of materials used on a mesh is a priority when looking at quick ways to boost frame-rates. Every new material in the scene adds an extra draw call, this can quickly get out of hand! The asset seen in the image above with some easy to implement optimizations such as combining the textures into one would halve the draw calls, if you do this over an entire un-optimized scene you can really make big savings.
I hope this information is useful to you and helps you improve your framerate and optimisation in your games. If you have any questions please feel free to reach out to me at my email, which you can find in the About section of my blog!